Online Auto Company
Company
Shop By Category
T&Cs
Shop Online
  • Free delivery across Australia on orders over $100
  • Interior, exterior and roadside car accessories in one place
  • Dispatch within 2 working days, then delivery in up to 7 working days by tracked courier
  • Tracking number emailed as soon as your order ships

Ceramic Headlight Restoration Kit | Headlight Restoration Kit | Headlight Restorer Wipes

Ceramic Headlight Restoration Kit

$67.99 $81.99 Save $14
  • Three Step System
  • About 30 Minutes
  • No Power Tools
  • Clear Ceramic Finish

Price: $67.99 $81.99

  • Delivery time: up to 7 working days by tracked courier, after dispatch within 2 working days
  • Free delivery across Australia on orders $100+, otherwise a flat $25
  • Pay by card or PayPal, handled by the payment provider
  • 15 days to change your mind, plus your Australian Consumer Law guarantees
Product specifications
Kit TypeThree step wipe kit
CoverageOne vehicle
Tools NeededNone
Time To CompleteAbout 30 minutes
Item Weight136 g
Weight136 g
Shipping & returns

Tracked delivery anywhere in Australia. It is free on orders of $100 or more, and a flat $25 below that. Allow up to 7 working days in transit after dispatch within 2 working days.

This shop's own returns policy gives you 15 days from purchase to change your mind, on every product it sells. Send it back in its original packaging with proof of purchase and we refund the price you paid for the goods, processed within 24 to 48 hours of the return arriving. You cover the cost of returning it unless the item is faulty.

If it arrives faulty, damaged or not as described, we put it right at no cost to you under the Australian Consumer Law's consumer guarantees, return postage included.

Shipping details · Refunds and returns

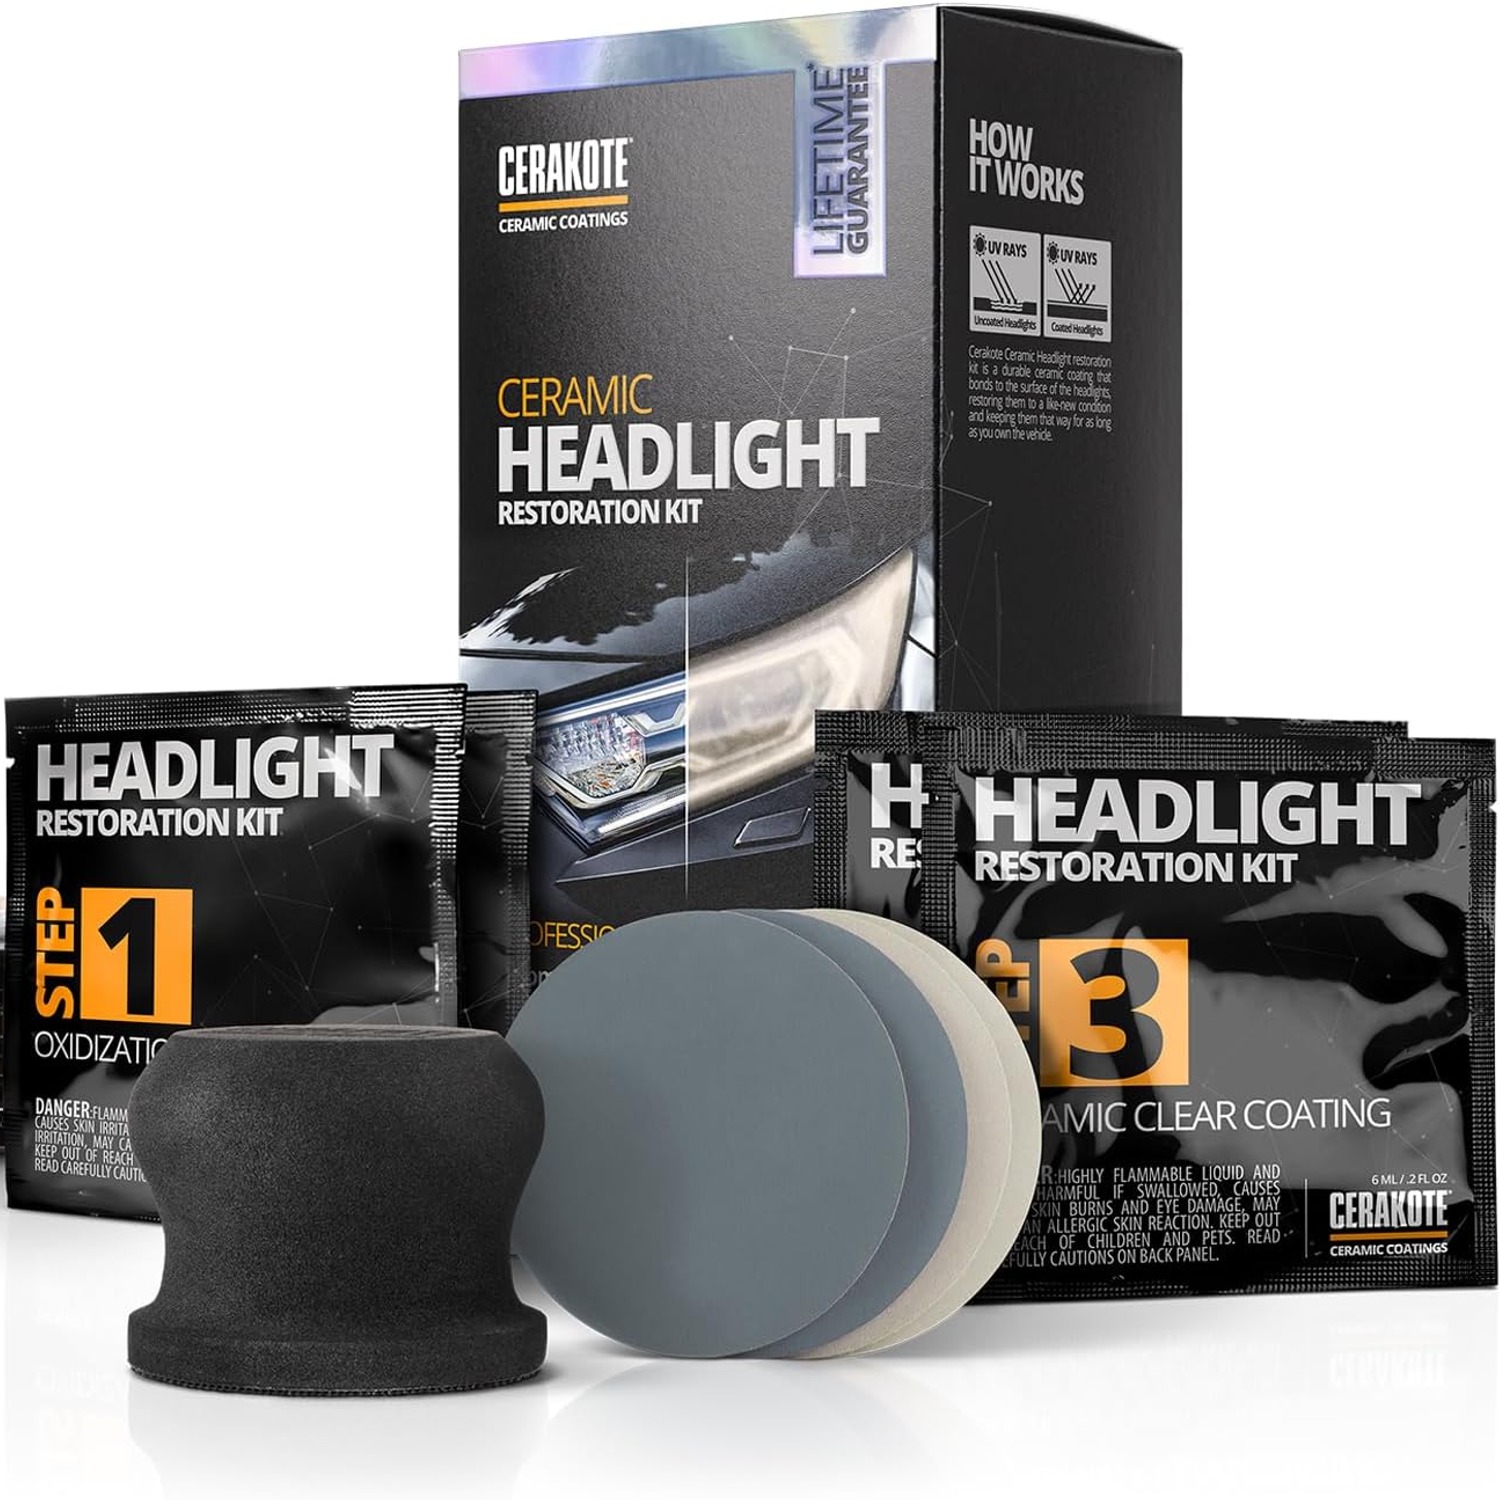
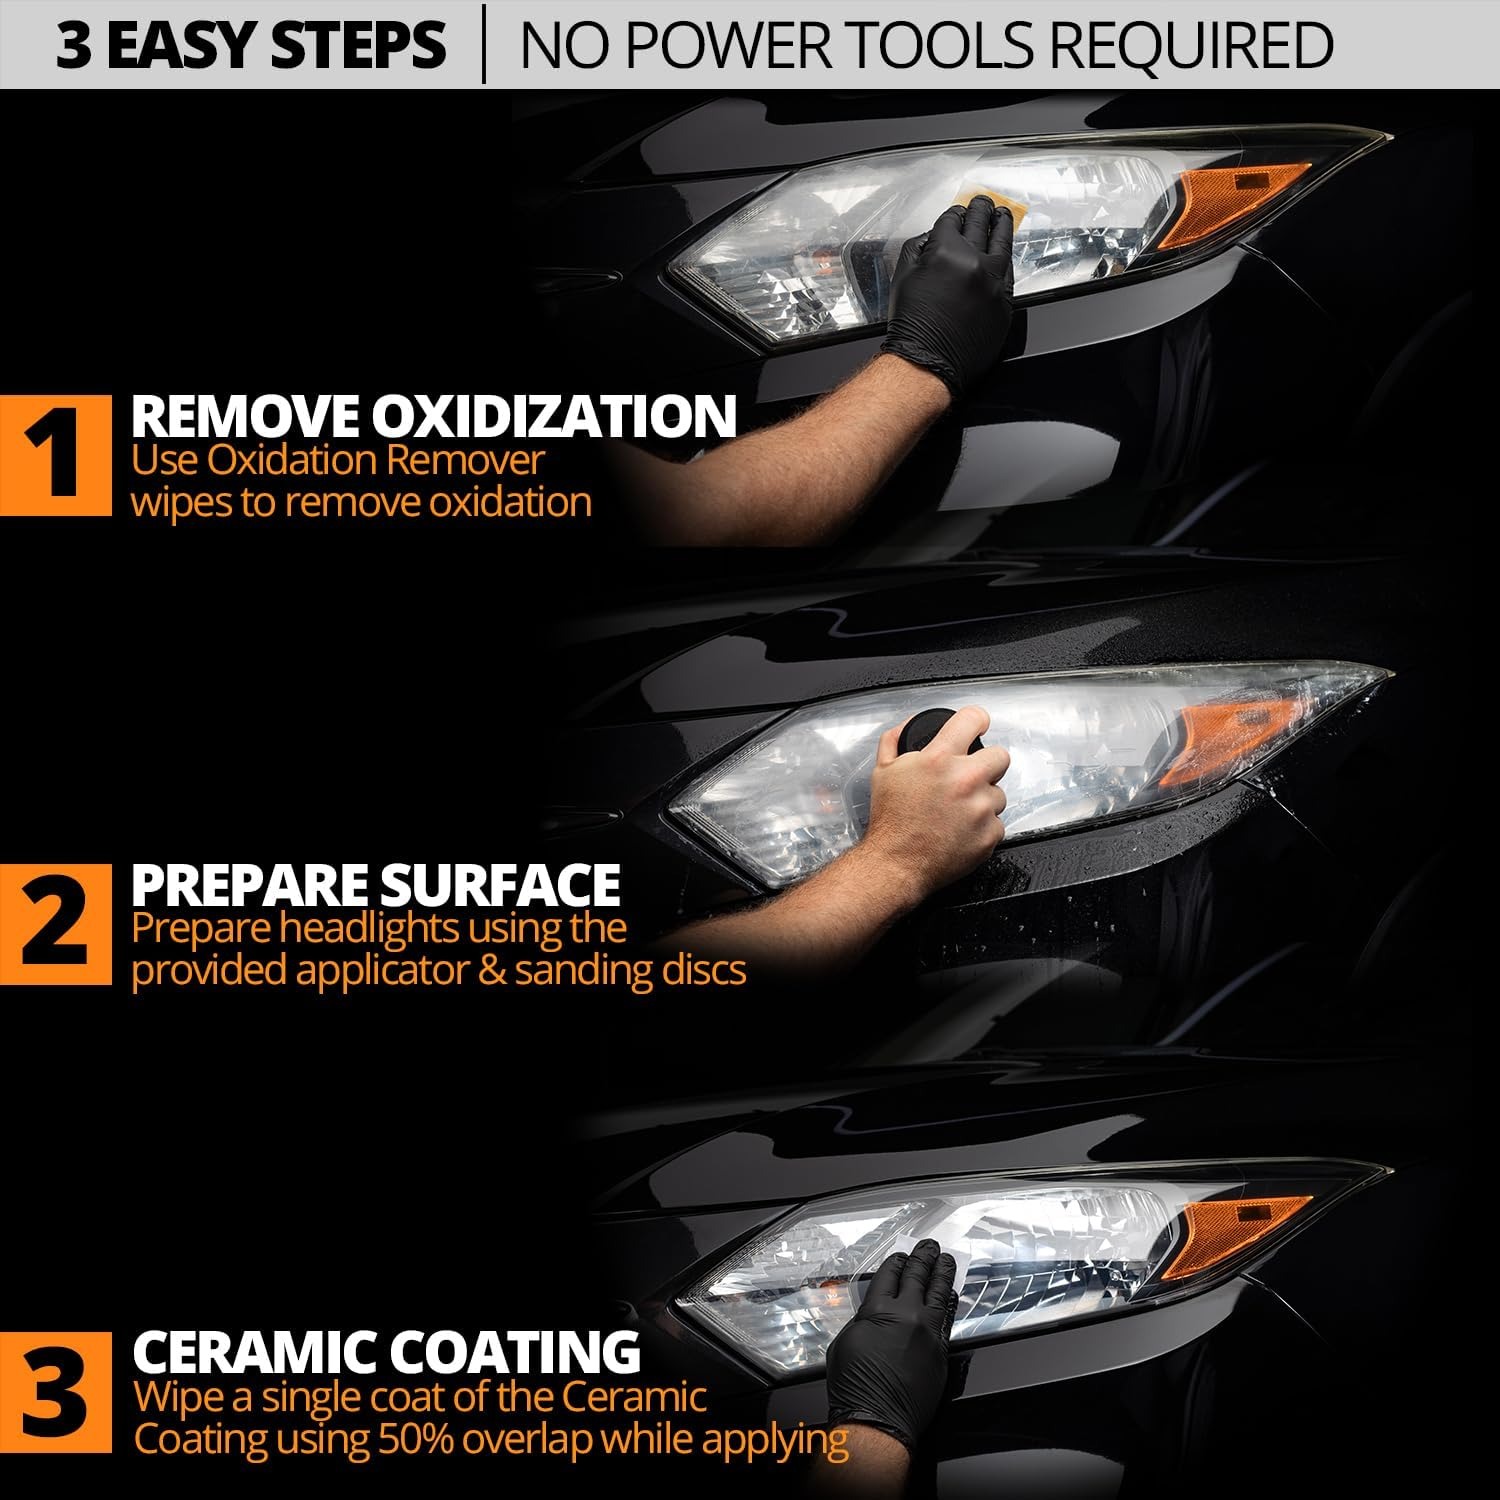
Three Step SystemOxidation remover, surface prep pad, then a ceramic coating wipe.
About 30 MinutesA typical two lamp job fits into a short driveway session.
No Power ToolsEverything is done by hand, with nothing to mix or sand with a machine.
Clear Ceramic FinishThe final wipe lays a clear coating that bonds to the lens for UV protection.

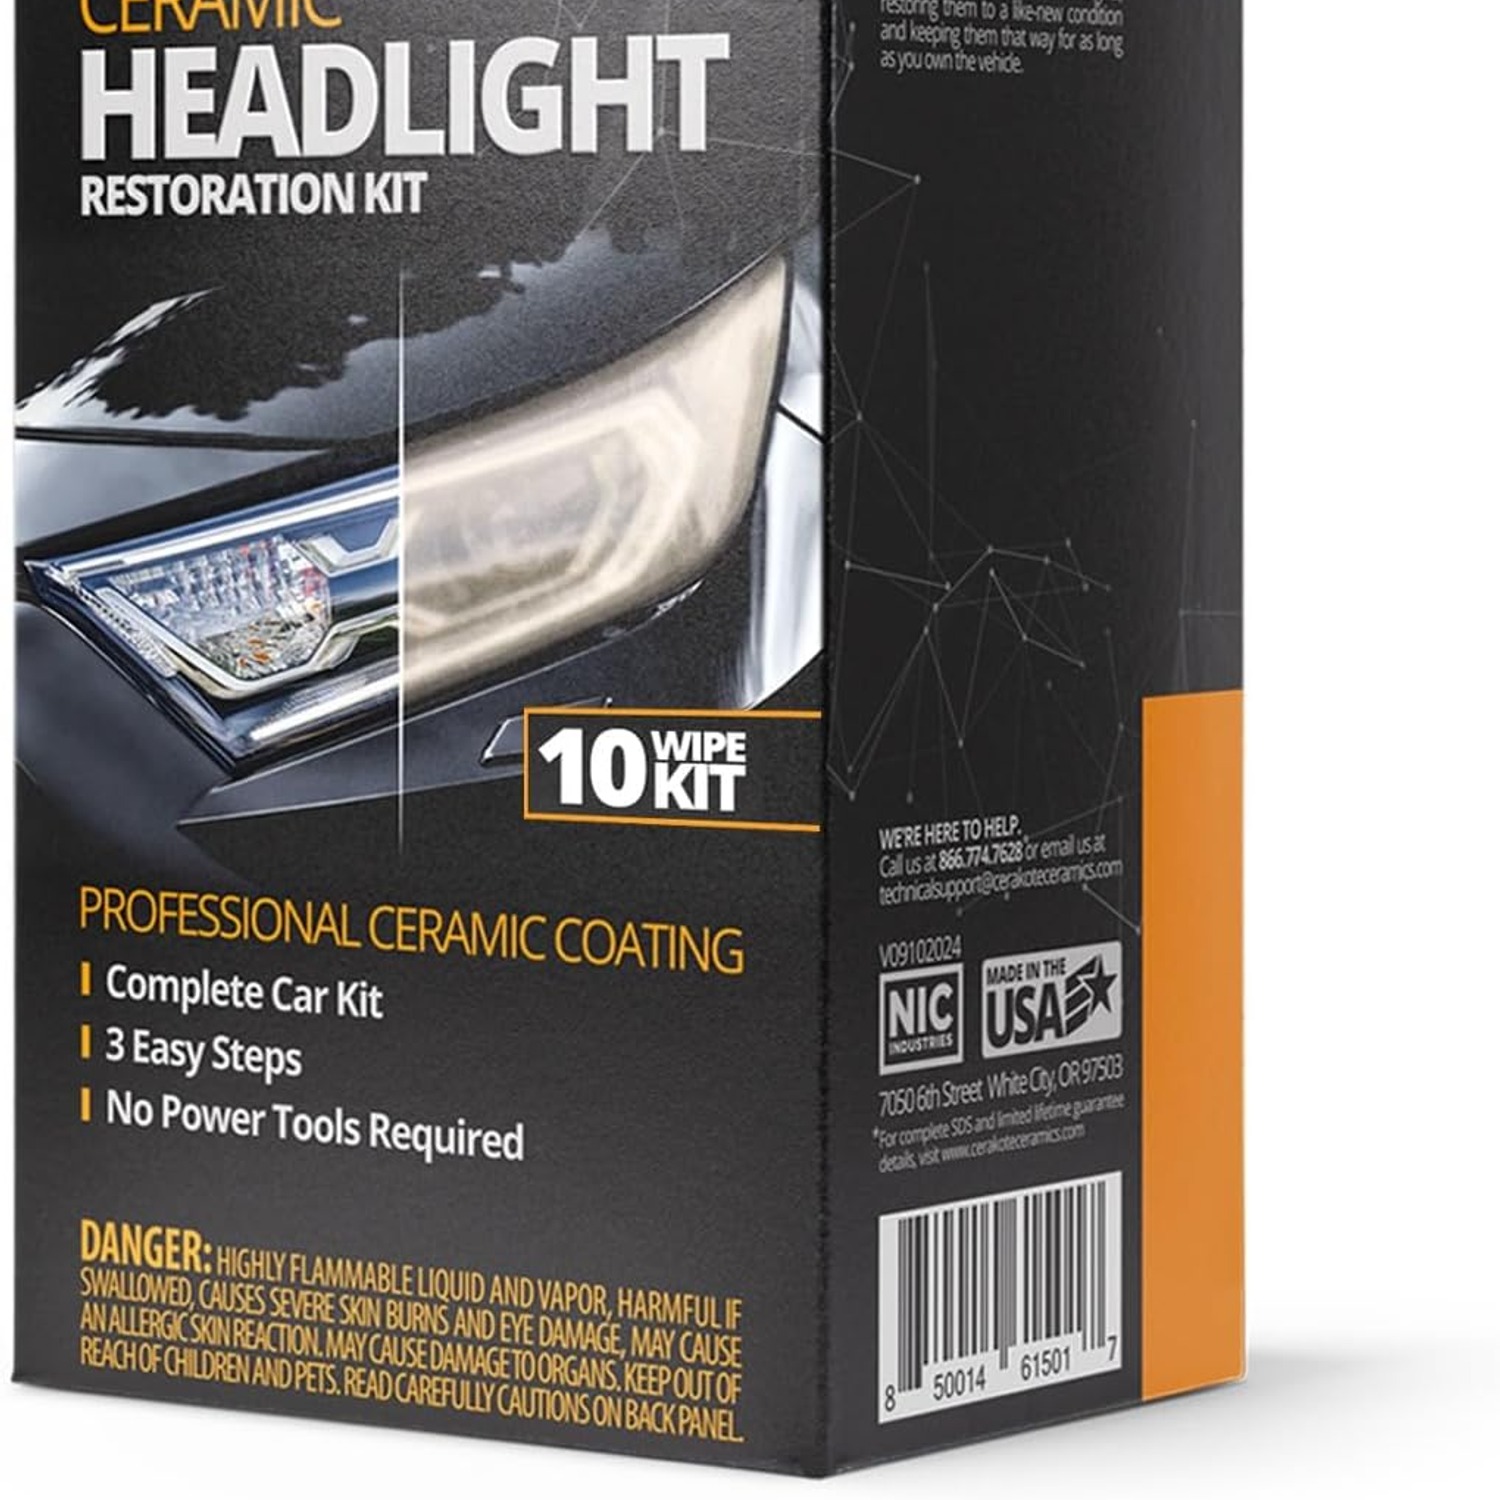
Bring clarity back to cloudy lenses with a ceramic headlight restoration kit you can use in your own driveway in about half an hour.

Three steps, three sets of pre-moistened wipes and pads, no power tools, no compounds to mix, and a clear ceramic coating that bonds to the lens for UV protection.

A complete three step ceramic headlight restoration kit sized to treat the headlights on one vehicle.

Step one uses oxidation remover wipes to lift the hazy, yellowed film sitting on the surface of the lens.

Step two is a hand held prep pad that works on the deeper oxidation and leaves the plastic ready to accept the coating.

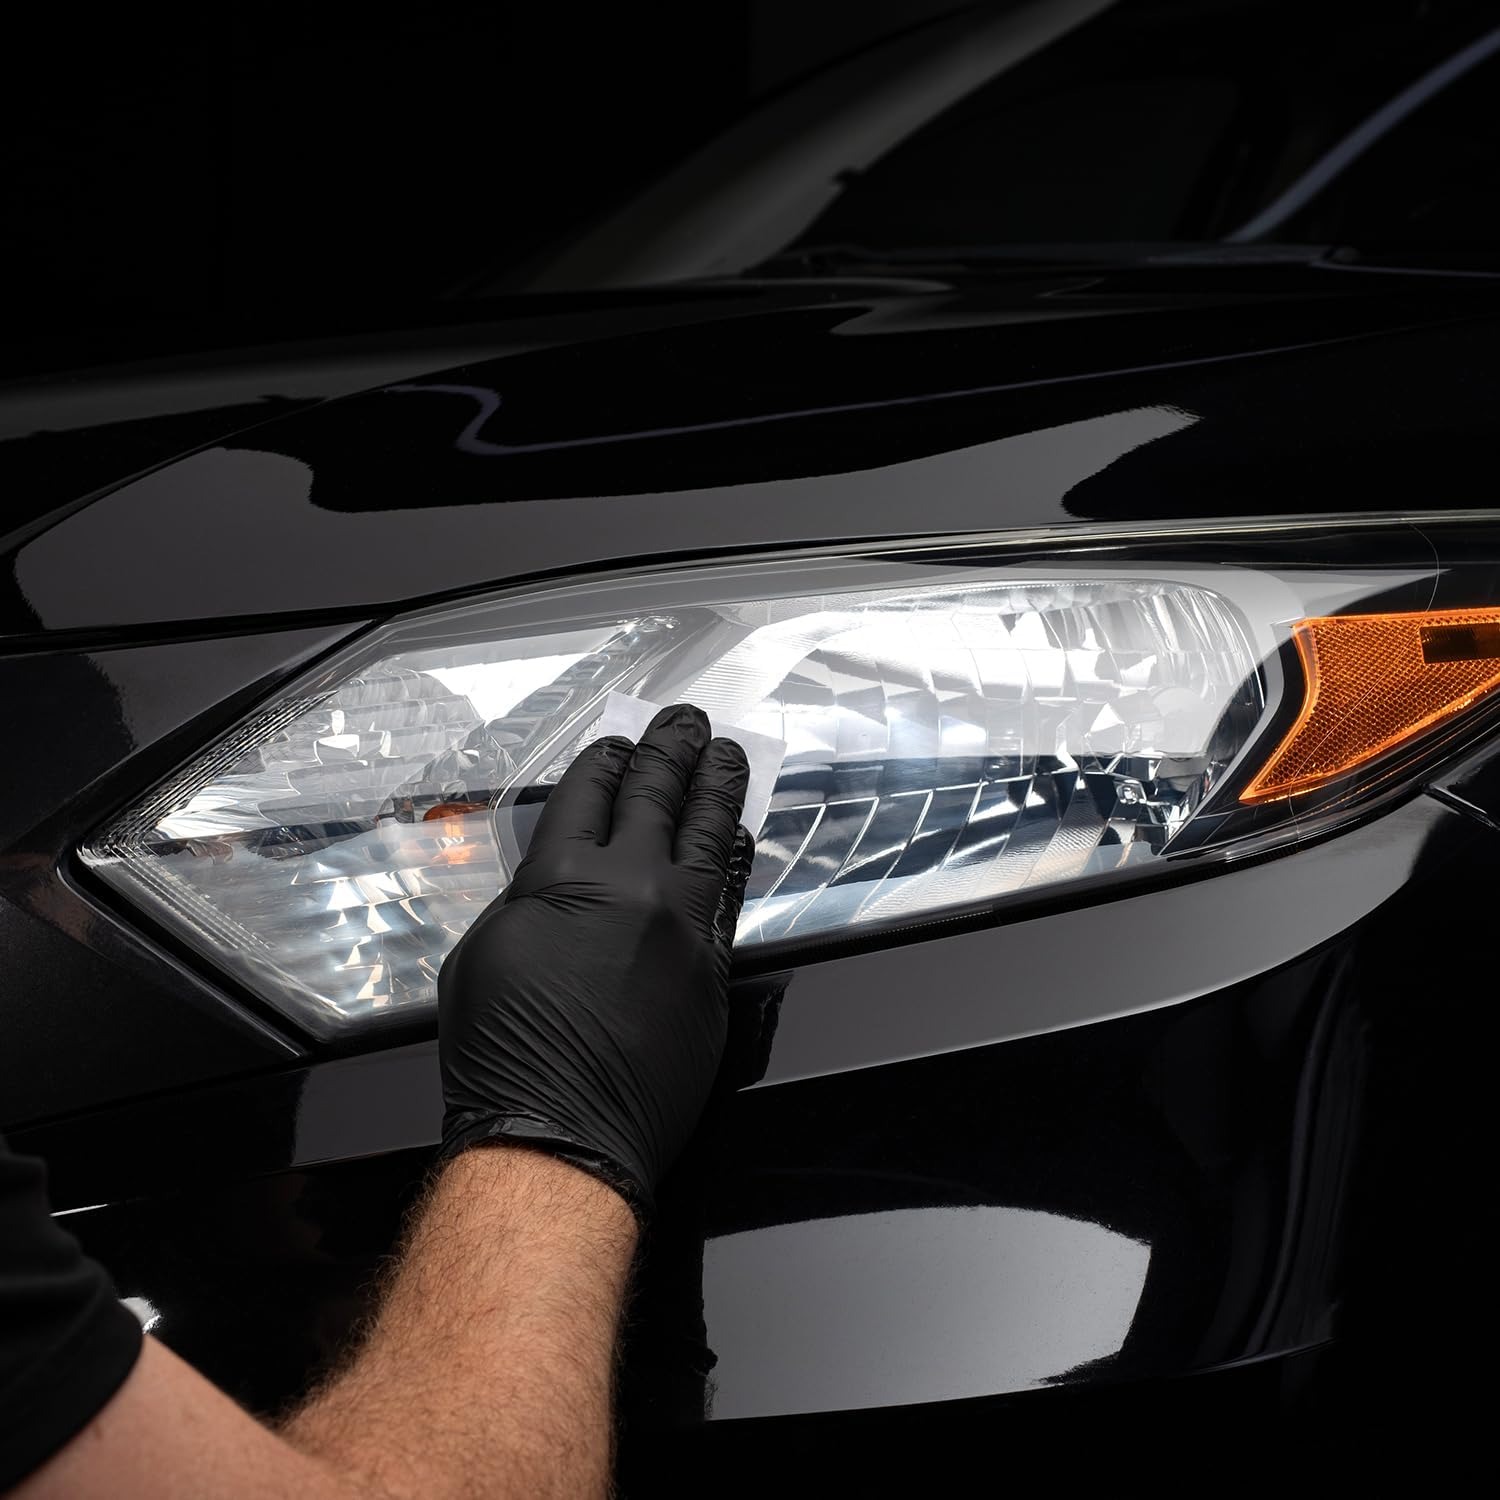
Step three is a pre-moistened ceramic coating wipe that spreads a clear layer over the cleaned lens for UV protection.

The whole job takes around 30 minutes and needs no drill, no polisher and no separate polish or compound.

Ceramic Headlight Restoration Kit

Headlight lenses on most modern cars are moulded from polycarbonate, a tough plastic that is coated at the factory with a thin clear layer. Years of sun, road grit, bug splatter and car wash chemicals wear that factory layer away. Once it goes, the raw plastic underneath starts to oxidise, and the lens turns hazy, cloudy or yellow. This ceramic headlight restoration kit is built to deal with that surface problem by hand, with no machine polishing and no spray gear.

Ceramic Headlight Restoration Kit

The kit works in three stages. The first stage is a set of oxidation remover wipes that take off the loose, hazy surface layer. Think of this as clearing the worst of the film so you can see what you are actually dealing with. Most lenses show a visible change at this point, and the wipe itself will often pick up a yellow tint, which tells you the oxidation is coming off rather than just moving around.

Ceramic Headlight Restoration Kit

The second stage is a hand held surface prep pad. This goes after the deeper oxidation that a wipe alone cannot reach, and it leaves a clean, evenly keyed surface so the final coating has something to bond to. Work in straight passes across the lens rather than tight circles, keep an even pressure, and stop to check your progress against the other lamp. Skipping or rushing this stage is the most common reason a DIY headlight restoration kit gives a patchy result.

The third stage is the pre-moistened ceramic coating wipe. One steady pass lays down a clear ceramic layer that bonds to the prepared plastic and provides UV protection, which is what the original factory coating was doing before it wore off. Let it cure undisturbed, out of rain and away from sprinklers, and resist the urge to touch or wipe the lens while it sets.

Results depend heavily on the starting condition of your lenses. Surface oxidation, yellowing and general haze respond well. Deep cracks in the plastic, moisture trapped inside the housing, delamination from the inside, or a lens that has gone milky internally cannot be corrected from the outside by any kit. Mask the surrounding paint and trim with tape before you start, test on a small corner of the lens first, and work in the shade on a cool surface rather than in direct midday sun.

Not sure yet? That is fine.

You can change your mind. This shop's own returns policy gives you 15 days from purchase to send it back in its original packaging with proof of purchase, and we refund the price you paid for the goods.

If it turns up faulty, damaged or not as described, that is on us. The Australian Consumer Law covers you, we pay the return postage, and you can have a repair, a replacement or your money back. Read the full detail on our refunds and returns page, or ask us anything before you order.

Frequently Asked Questions

What exactly is in this kit?

It is a three step system made up of oxidation remover wipes, a hand held surface prep pad, and pre-moistened ceramic coating wipes. Everything needed for the job is supplied in the pack. You do not need to buy polish, compound or applicators separately.

How many headlights will it treat?

The kit is sized to treat one vehicle, which in most cases means a pair of headlights. If your lenses are very large or very badly oxidised, you may use more of the materials on each lamp. Working carefully and not over-saturating each wipe helps the kit go further.

How long does the whole job take?

Around 30 minutes for a typical pair of lenses. That includes masking, the three steps and a short wait between stages. Heavily oxidised lamps can take longer because the prep stage needs more work.

Do I need a drill or polisher?

No. This is a hand application kit and no power tools are needed. That is part of the appeal if you do not own a polisher or do not want to risk machine work on plastic.

Will it fix yellow headlights?

Yellowing caused by oxidation on the outer surface is exactly what the first two steps target. Once the oxidised layer is removed, the lens usually looks much clearer. Yellowing that comes from inside the housing or from a tinted lens cannot be removed from the outside.

Can it repair cracked lenses?

No. Deep cracks in the plastic cannot be filled or corrected by any surface treatment. If a lens is cracked, the housing generally needs replacing.

What about moisture or condensation inside the headlight?

Internal moisture is a sealing problem, not a surface problem, so this kit cannot help with it. You would need to find and fix the failed seal or vent. Treating the outside while water sits inside will not clear the haze you are seeing.

Is this suitable for a beginner?

Yes. The steps are in order, the wipes come pre-moistened and there is nothing to mix or measure. The main skill is patience during the prep stage.

Should I mask the paint around the headlight?

Yes, and we strongly recommend it. Use automotive masking tape around the full edge of the lamp, including any chrome trim or rubber seal. It protects the paint and also gives you a crisp edge to work to.

Should I test it first?

Yes. Test on a small, low-visibility corner of the lens before doing the whole lamp. This lets you see how your particular lens responds before you commit to the full surface.

Can I use it in direct sunlight?

It is better to work in the shade on a cool lens. Heat makes the wipes dry out faster and can cause uneven coverage. Early morning or late afternoon in a carport or garage is ideal.

Does it work on tail lights and indicator lenses?

The system is designed for headlight lenses, which are usually clear polycarbonate. Coloured lenses are a different material and finish, so test a small hidden area first if you want to try. Go gently and stop if you see any colour lifting.

Will it work on motorcycle or boat lenses?

Many plastic lenses respond similarly to a car headlight, but we cannot promise a result on every lens type. Test a small area first and keep the prep stage light. Older or already-scratched plastics behave less predictably.

How long will the result last?

That depends on your climate, where the car is parked, how often it is washed and how heavily the lens was oxidised to begin with. We do not make a claim about a set lifespan. Garaged or shaded cars generally hold their finish longer than cars left in the open sun.

Do I need to wash the car first?

Wash and dry the lenses before you start. Removing dirt, bug residue and road film means the oxidation remover works on the oxidation rather than on grime. A clean, dry surface is the single best preparation you can do.

Can I apply wax or sealant over the coating?

Let the ceramic coating cure fully first. After that, avoid rubbing waxes or polishes over the treated lens, as abrasives can dull the new layer. A gentle wash is usually all the lens needs.

What if the result looks patchy?

Patchiness almost always traces back to uneven work at the prep stage. Going back over the lens with the prep pad in consistent, straight passes usually evens things out before you re-coat. Even pressure matters more than hard pressure.

Can I stop after step one?

You can, but the lens will be left with bare, unprotected plastic that oxidises again fairly quickly. The coating step is what gives the surface its UV protection. We recommend completing all three stages in one session.

How soon can I drive the car?

Allow the coating to dry undisturbed before driving, and keep the car out of rain and sprinklers during that time. Driving through rain or a wash too early can disturb the finish. A quiet hour in the driveway is the safest approach.

Is this the best headlight restoration kit for heavily oxidised lenses?

It handles surface and deeper oxidation through the wipe and prep stages, so badly hazed lenses often show a big improvement. Extremely degraded lenses that feel rough and pitted may need more time on the prep pad. Set your expectations by the condition of the plastic.

Does it leave scratches?

Used as directed with even pressure, the prep pad is intended to refine the surface rather than gouge it. Pressing too hard in one spot or working with grit on the pad can leave marks. Keep the lens and pad clean as you work.

Can I use it on a lens that has already been restored before?

Yes, in most cases a previously restored lens can be treated again. Any old coating or sealant usually comes off during the first two stages. Just allow a bit more time on the prep step.

What should I do with leftover wipes?

Reseal unopened sachets and store them upright somewhere cool and dry. Once a sachet is opened the wipe starts drying out, so use it in the same session. Dispose of used wipes and pads with household waste.

Are gloves included?

The kit contents are the oxidation remover wipes, surface prep pad and ceramic coating wipes. Disposable gloves are a sensible addition from your own supplies if you prefer not to handle the wipes directly. Wash your hands after use either way.

Does the kit have a smell?

Products of this type usually have a mild solvent odour while you work. Use it in a well ventilated spot such as an open garage or driveway. The smell fades as the lens dries.

How long will delivery take?

We dispatch within 2 working days. Delivery then takes up to 7 working days by tracked courier, anywhere in Australia. It is free on orders of $100 or more and a flat $25 below that, shown in your cart before you pay. You get a tracking number by email once the parcel is dispatched.

Can I buy more than one kit?

Yes. If you are treating more than one vehicle, order a kit per vehicle so you have enough material for each pair of lenses. Spare kits also store well for future touch-ups.

What vehicles is this not suitable for?

It is not suitable for glass headlight lenses, for lamps with cracks or internal damage, or for lenses where the haze sits behind the outer surface. In those cases the housing itself usually needs attention. Check your lens by feeling the outside with a clean finger before buying.

What if it is not right for me?

If the kit arrives damaged, incomplete or is not what you expected, contact our support team with your order number and we will sort out a return or replacement under our standard returns policy. Please get in touch before opening the sachets if you think you have ordered the wrong product. We would rather help you choose correctly than have you stuck with something that does not suit your car.

Is there a warranty?

No separate warranty is sold. The Australian Consumer Law applies in full, and faulty items are put right. Contact us with your order number and a photo and we will sort it out.

How to Restore Cloudy Headlights at Home, A Practical Buyer's Guide

6 min read Online Auto Company

Why headlights go cloudy in the first place

Almost every headlight made in the last twenty-five years uses a moulded polycarbonate lens instead of glass. Polycarbonate is light, tough and cheap to shape, which is why it won. It has one weakness. Raw polycarbonate does not like ultraviolet light.

To get around that, factories spray the outside of the lens with a thin, clear, hard coating. It does the UV work. It also wears out. Sun, heat, road grit, bug splatter, winter salt, and years of car wash brushes slowly chew through that layer. Once it is gone, the plastic underneath starts to break down on the surface, and you get the look everyone recognises: a milky, yellow, sandblasted haze that makes the whole front of the car look tired.

The important part is that the damage is usually right on the outside. That is good news, because a surface problem can be treated with a surface product. You do not need a new headlight assembly to fix a lens that has simply lost its coating.

What a three step kit actually does

This ceramic headlight restoration kit breaks the job into three parts, and each part has a clear purpose.

The first step uses oxidation remover wipes. These take off the loose, hazy surface layer that has already broken down. You will often see the wipe pick up a yellow or brown tint, which is a good sign. That colour is the oxidation leaving the lens instead of being smeared around on it.

The second step is a hand held surface prep pad. The wipes clear the top film, but deeper oxidation sits below that, and the lens also needs a lightly keyed surface so the coating has something to grip. The pad handles both jobs at once. This is the stage that decides whether your result looks even or blotchy, so it deserves the most attention.

The third step is a pre-moistened ceramic coating wipe. One steady pass lays a clear ceramic layer over the cleaned plastic. It bonds to the lens and gives UV protection, taking over the role the original factory coating used to play. There is no mixing, no spray gun and no curing lamp involved.

The whole sequence fits inside about half an hour for a normal pair of lamps, and no power tools are needed at any point.

Who this kit suits

It suits the owner of a car that is five to fifteen years old with lenses that have gone hazy or yellow but are otherwise intact. It suits people selling a car who want the front end to look cared for. It suits anyone who wants a tidy result without owning a polisher or booking the car into a detailer.

It also suits renters and apartment dwellers, because the job needs a parking space and a bit of shade, not a workshop. You can do it in a visitor bay with a roll of masking tape and twenty minutes of quiet.

There are cases where it will not help, and it is only fair to be plain about them. If the lens has deep cracks, the plastic is physically broken and no coating fills that. If there is water or condensation sitting inside the housing, the problem is a failed seal or vent, and treating the outside changes nothing you can see. If the lens has gone milky from the inside, which happens on some older designs when the inner surface degrades, outside work will not reach it. Feel the outside of the lens with a clean finger. If it is rough and chalky, you are in surface oxidation territory and a kit is the right tool. If it feels smooth and glassy but still looks hazy, the haze is probably internal.

Setting up before you start

Wash the lenses and the surrounding panel first, then dry them properly. Oxidation removal works much better on a clean surface, because otherwise the wipe spends its effort on bug residue and road film.

Next, mask. Run automotive masking tape right around the edge of the lamp, covering paint, chrome trim and rubber seals. It takes a couple of minutes and it protects the areas you do not want treated. It also gives you a neat border to work to, which keeps the finish looking deliberate rather than rubbed.

Pick your conditions. Shade is better than sun, and a cool lens is better than a hot one. Direct midday sun dries the wipes faster than you can spread them, and that is where streaking starts. An overcast morning or a carport works well.

Finally, test. Pick a small, low-visibility corner of the lens, usually the bottom outer edge, and work it with the first wipe. Look at the result in good light before you commit to the whole lamp. Every lens has a slightly different history, and a two minute test tells you what yours is going to do.

Working through the steps

Take the first wipe and work across the lens in overlapping passes rather than tight circles. Circles tend to leave swirl patterns that catch the light later. Cover the whole lens, including the awkward curved edges near the bonnet line where oxidation usually sits heaviest.

When you move to the prep pad, keep your pressure even and your passes straight. The temptation is to lean hard on the worst-looking patch, but that creates a dip in the finish. Instead, do the whole lens evenly, then check your progress and do another full pass if you need one. Step back and compare the lamp you are working on against the untouched one every so often. That side by side check is the quickest way to judge when you have done enough.

Wipe away any residue before the coating step. The lens should be clean and dry when the ceramic wipe goes on. Lay the coating down in one steady direction rather than scrubbing it back and forth, then leave it alone. Do not poke it, do not buff it, do not check it by touching. Let it cure out of the weather, away from sprinklers and rain, and keep the car still for that period.

If a patch looks uneven once everything has dried, it is almost always a prep issue. Going back over the lens with the prep pad in consistent passes before re-coating usually sorts it.

Looking after the result

After treatment, wash the lenses the way you would wash paint. Mild car shampoo, a soft mitt, plenty of water. Avoid abrasive cleaners, scouring pads and harsh degreasers on the lens, because they will dull the new layer.

Be careful with pressure washers. A wide fan held well back is fine. A narrow jet held close to the edge of the lamp is asking for trouble on any headlight, treated or not.

Where you park matters more than most people expect. A car that sits in full sun all day every day will oxidise again faster than one in a garage or under a carport. We do not make claims about how long any particular finish will hold, because climate, parking and washing habits vary enormously. What we can say is that keeping the lens clean and out of relentless sun gives you the best chance of a long run between treatments.

Store leftover sachets sealed, upright, cool and dry, and out of reach of children and pets. Once a sachet is opened the wipe begins drying out, so use it in the same session.

The short version

Cloudy headlights are usually a worn factory coating and surface oxidation, not a broken part. A three step ceramic headlight restoration kit gives you the oxidation remover wipes, the prep pad and the ceramic coating wipes in one pack, sized for one vehicle, with no power tools needed and about 30 minutes of work.

Mask the surrounding paint, test a small area first, work in the shade, and take your time on the prep stage. Expect a real improvement on hazy and yellowed lenses. Do not expect it to fix cracks, internal moisture or damage inside the housing, because nothing applied to the outside can reach those. Check your lens with a finger before you buy, and you will know straight away whether this is the job for you.

Browse the shop

Ready to clear those lenses?

Order the three step ceramic headlight restoration kit and set aside half an hour this weekend.

Ask us a question

Page summary

A three step ceramic headlight restoration kit for treating the headlights on one vehicle. Step one uses oxidation remover wipes to take off hazy surface oxidation. Step two uses a hand held surface prep pad to remove deeper oxidation and prepare the lens. Step three uses pre-moistened ceramic coating wipes that lay down a clear ceramic coating bonded to the lens, providing UV protection. No power tools are required and everything needed is supplied in the pack. The job takes about 30 minutes. Item weight is 136 g. Results depend on lens condition, and internal cracks, moisture or damage inside the housing cannot be corrected from outside.